Adobe Creative Cloud App
For employees:
To use the Adobe Creative Cloud applications on the PC, the Adobe Creative Cloud app is required as a central application via which Adobe applications such as Acrobat Professional or Photoshop are installed and also updated. For all devices centrally administered by the University Computer and Media Centre (URMZ), the Adobe Creative Cloud App will be distributed automatically from 08.06.2020.
The Adobe Creative Cloud app can be found in the Start menu after distribution.
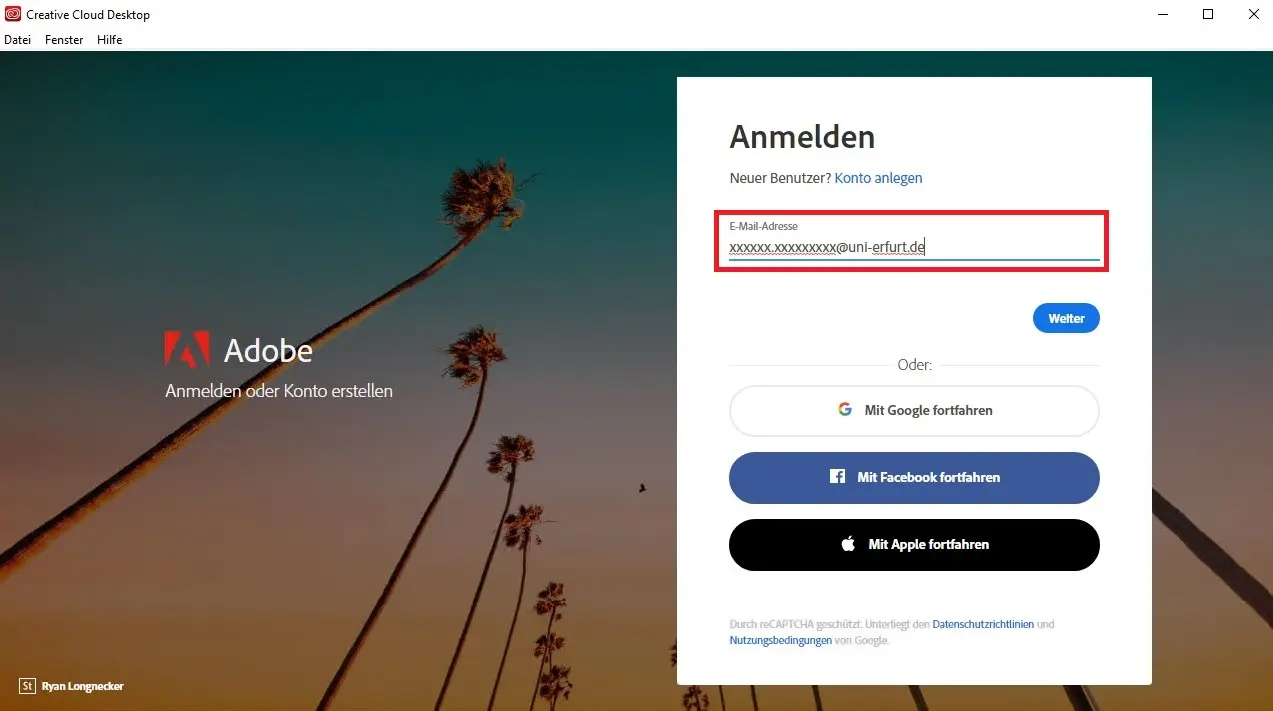
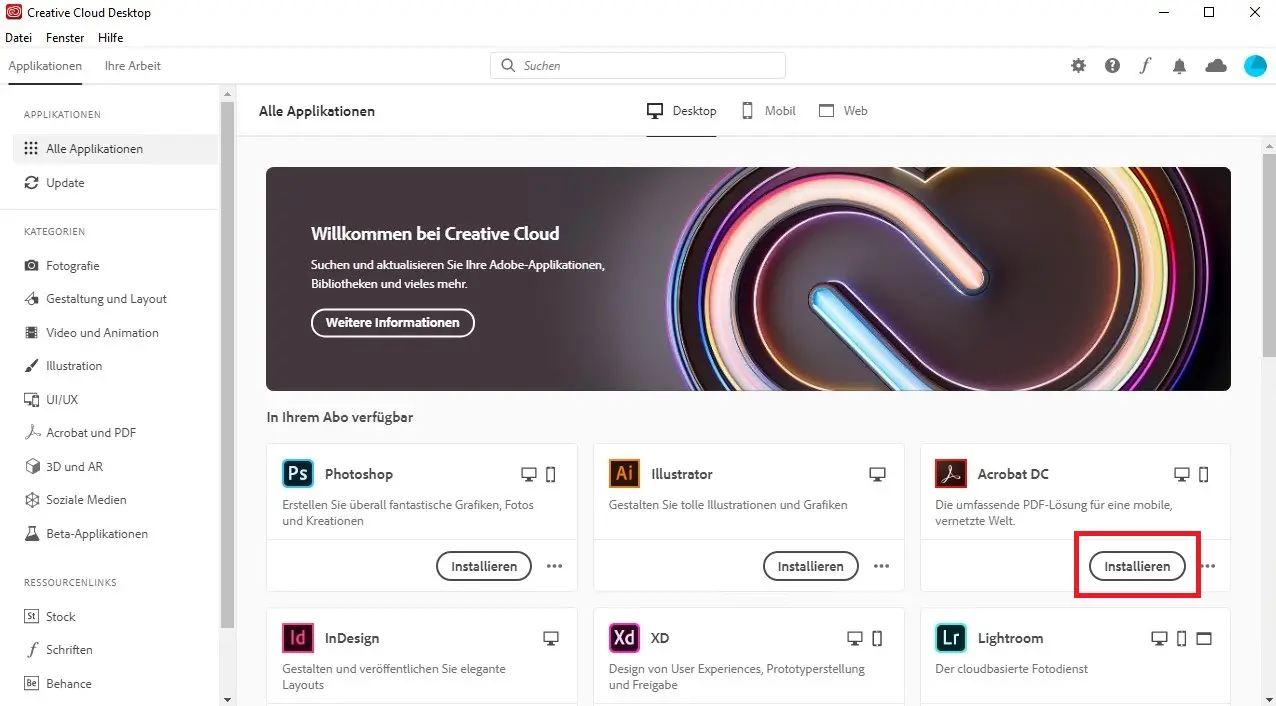
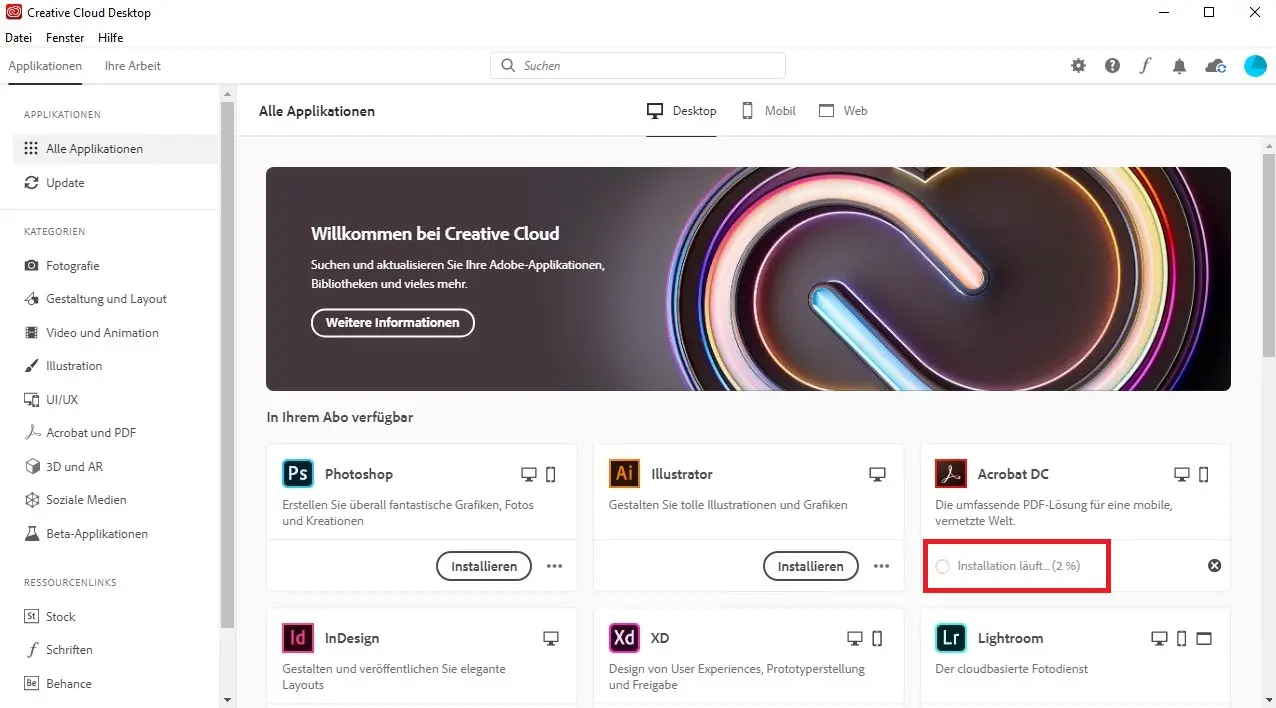
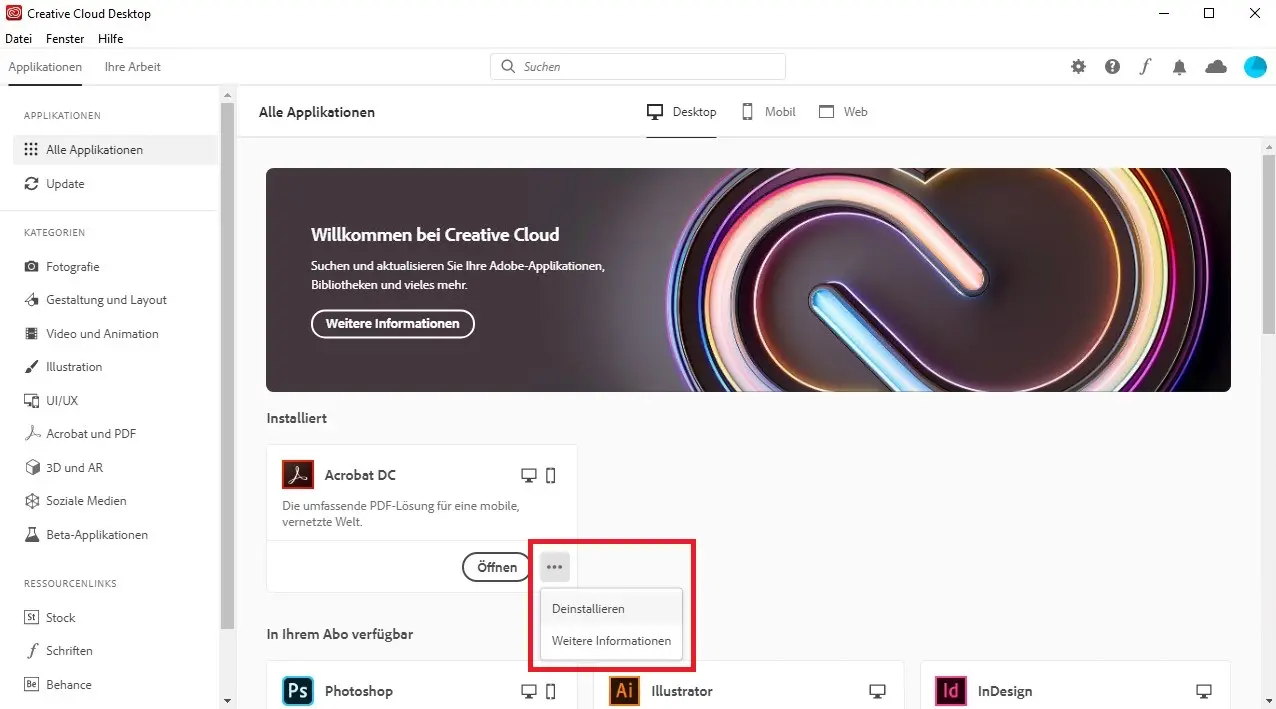
When opening the Adobe Creative Cloud App for the first time, it is necessary to log in with your Adobe Enterprise ID. After registering your myAdobe account via the portal of the Thuringian IT Center (ITZ), this is the university email address (Figure 1). The Adobe Creative Cloud app starts in the "All apps" area, where the required application can be selected and downloaded and installed by clicking "Install" (Figure 2 and 3). If an application is no longer needed, it can be uninstalled in the same way (Figure 4).
The installed applications can be accessed either via the Adobe Creative Cloud app or, as usual, via the Start menu.
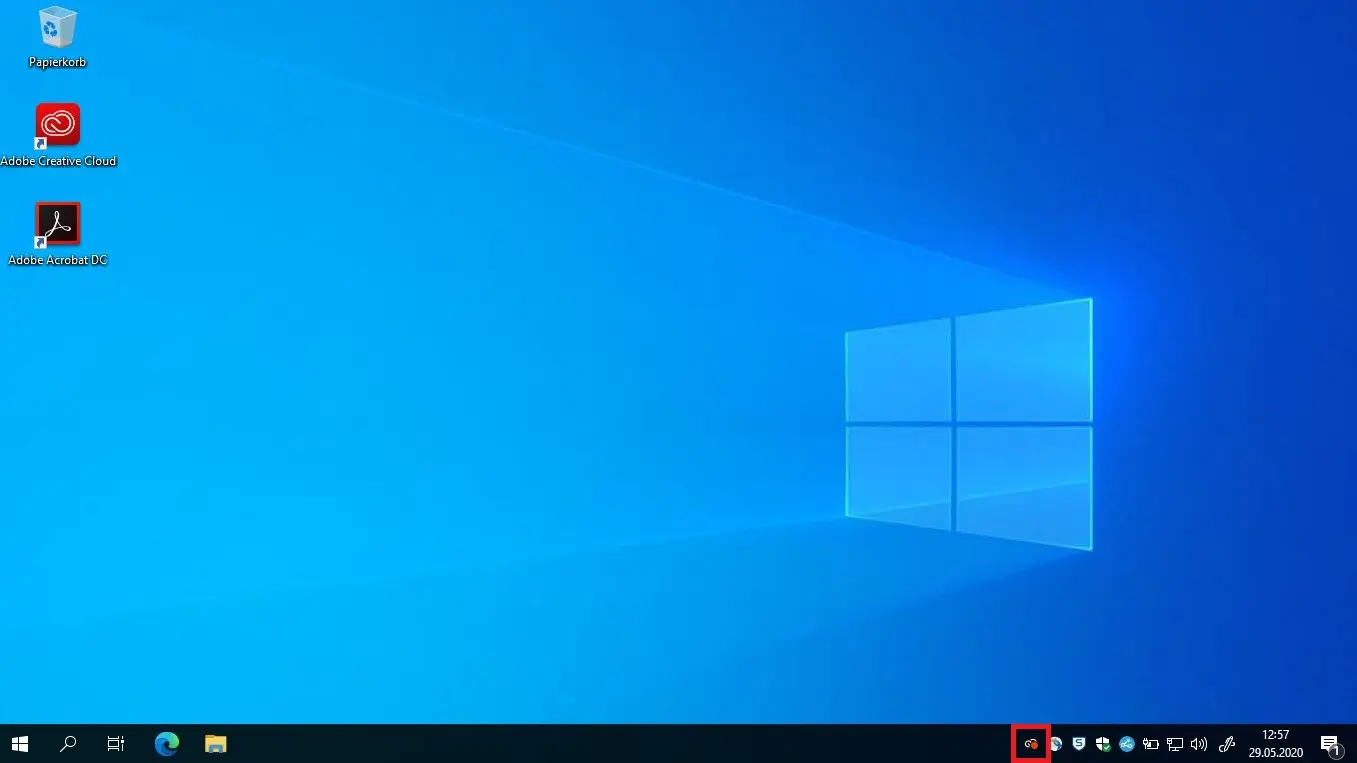
The taskbar icon (bottom right) provides quick access to the Adobe Creative Cloud app at any time. A small red dot indicates completed installations, available updates, etc. (Figure 5).
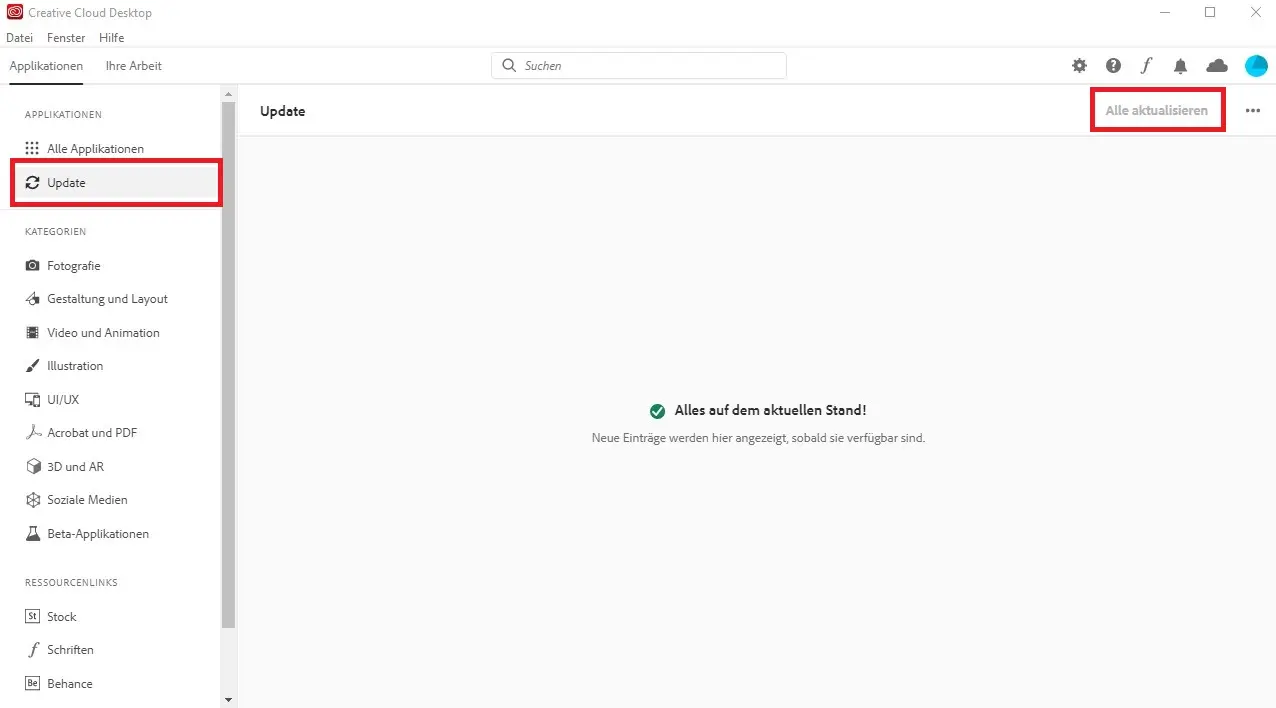
If updates are available for the installed Creative Cloud apps, they can be quickly and easily brought up to date and secure in the Adobe Creative Cloud app via the "Update" area and a click on "Update all" (Figure 6). As far as possible, the University Computer and Media Centre (URMZ) tries to update the installed apps automatically (weekly).
Please also refer to the Adobe Creative Cloud security information provided by the data protection officers.
For students:
For the use of Adobe products in the pools of the University of Erfurt, a so-called Adobe Enterprise ID is required. You can obtain this by registering once via the Thuringian universities' portal for teaching in PC pools. Simply follow the steps described on the portal. After registration, you will receive an e-mail to your university account containing a link for creating your Adobe ID.
You can then sign in to the Adobe Creative Cloud app to use Adobe products. The installation of further software from the Creative Cloud or private use at home is not possible, but only the use in the pools of the University of Erfurt.
Sophos Antivirus
Scan the computer for viruses
If you suspect a virus and want to make sure that all files are scanned once for viruses, do the following:
- Open Sophos (double-click on the Sophos icon in the system tray, or via Start -> Sophos -> Sophos Endpoint Agent).
- Left-click on the blue "Scan" button
- Sophos will immediately start scanning the computer for viruses and will report the result at the end
A virus scanner can never know all viruses! So there is no absolute certainty to be virus-free.
Scan specific files and directories for viruses (right-click scan)
- if you suspect a virus
- if you are working with removable media (USB stick, memory card, CD/DVD), each time you insert the media
perform a right-click scan:
- Go to the desired drive or directory (via Explorer).
- right-click on a file, directory or disk and select "Scan with Sophos Endpoint" from the context menu
- Sophos will immediately start scanning for viruses
- The result is displayed at the end
What to do when viruses are found?
Disconnect the infected computer from the Internet and inform the University Computer and Media Centre ( URMZ) service desk.
You can find more information on our IT security pages.
TeamViewer (University Computer and Media Centre (URMZ) Remote Support)
TeamViewer on desktop PCs
After logging in to the PC (standard installation of the University Computer and Media Centre (URMZ)), you will find the TeamViewer icon in the notification area. If you click on the icon, a window will open.
When the University Computer and Media Centre (URMZ) support asks you, please name the one that appears in it - your ID. Then it will try to establish a connection from the University Computer and Media Centre (URMZ) to your PC.
At the point "Wait for authentication" please tell the support your password. It is always 8 characters long and consists of numbers and letters. The password is generated again and again after each session. This ensures that no one can automatically connect to your PC.
Now a successful connection/remote control should have been established.
A connection/remote control via PC is only possible within the university network (LAN).
TeamViewer on notebooks
In the start menu you will find a shortcut to the TeamViewer Quick Support tool (standard installation of the University Computer and Media Centre (URMZ)). You start this. When the support asks you, please name your ID. Then it will try to establish a connection.
At the point "Wait for authentication" please tell the support your password. This is always 8 characters long and consists of numbers and letters. The password is always regenerated after each session. This ensures that nobody can automatically connect to your PC.
Now a successful connection/remote control should have been established.
A connection/remote control via notebook is generally possible everywhere. Prerequisite is an existing Internet connection and that you are already logged in!
Mozilla Thunderbird (IMAP mail)
Mozilla Thunderbird is a free e-mail programme from the Mozilla project.
This programme is distributed to all users who do not use Microsoft Exchange and therefore Outlook.
Add university calendar
To add your university calendar in Thunderbird proceed as follows:
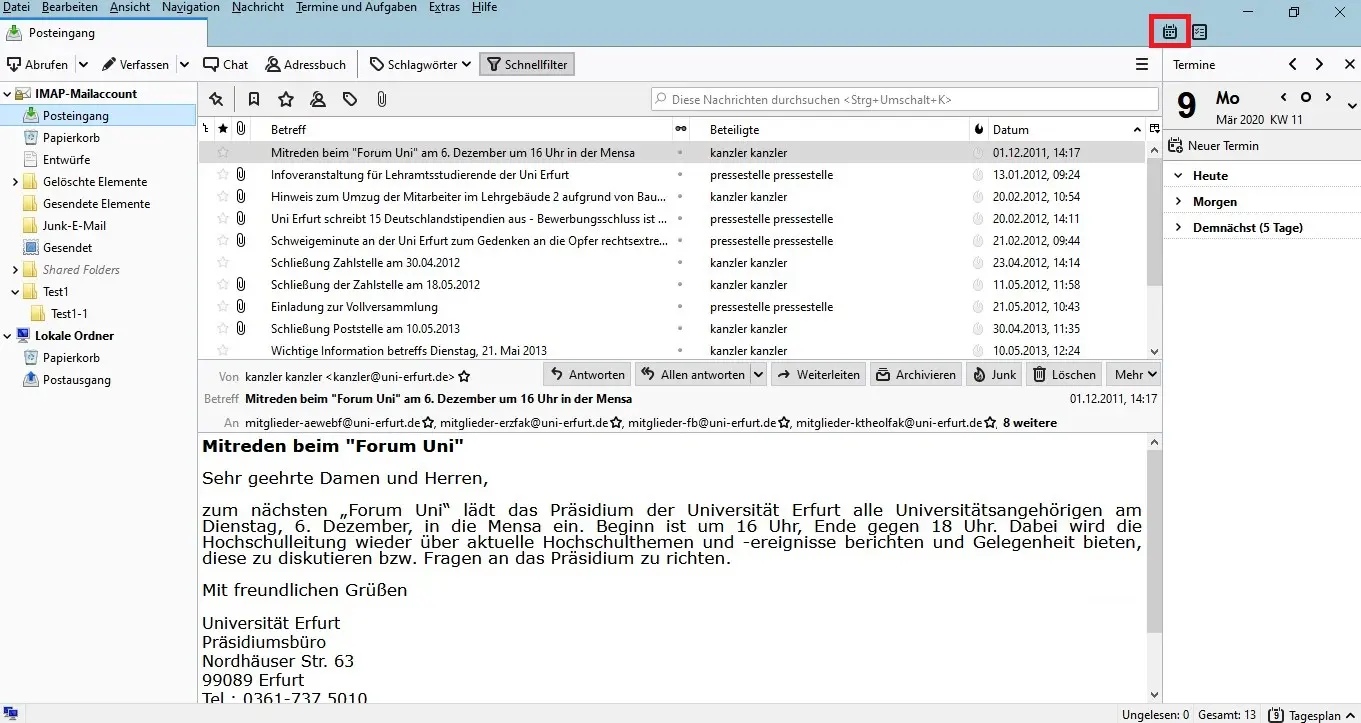
- Open the calendar tab via the calendar button in the upper right corner (image 1).
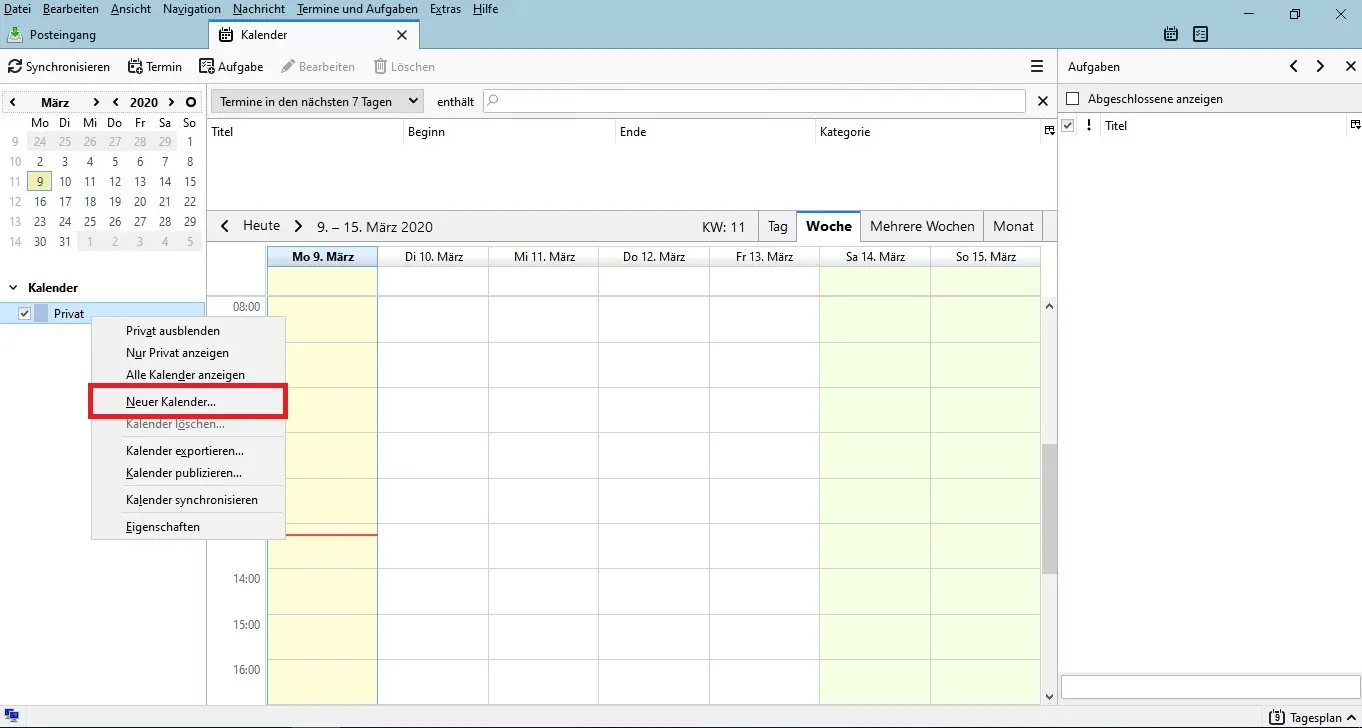
- In the calendar tab, right-click on "Private" in the left pane and click on "New Calendar" in the context menu that appears (Figure 2).
- In the following dialog windows, select in order:
- On the network
- CalDAV
- At "User name" enter your user name.
- At "Address" enter: imap.uni-erfurt.de/davserver/dav/home/%username%/calendar (%username% please replace with your username)
- Finally, at "Name" enter your full name.
- In the following window enter your password. The username should already be filled in.
Now you have integrated your university calendar! Under Calendar you will find 2 calendars. You can delete the calendar marked with Private (right click on "Private" and then on "Delete calendar" - confirm with "OK").
This way you can also integrate other, private calendars.
Backup and restore address book
Back up the address book data
- In Thunderbird, click Tools\Address Book.
- Then, in Address Book, click Tools\Export.
- Next, pick a location (H: is best), give the address book a name, and click Save.
Restore the address book data
- In Thunderbird, click on Tools\Address Book.
- In the address book, then click Tools\Import.
- Select Address Books and click Next.
- Next, click on "Text file" and click on "Next".
- Here you now search for your exported address book (*.ldif), select it and click "Open".
- Finally, a success message will appear stating that your address book has been successfully imported.
- Click on "Finish".
Now, in addition to the address books you already have, you have an additional address book with the name you assigned as the file name during the backup. You can continue to use this as an address book or drag and drop some/all contacts from the restored address book into already existing address books.
FileZilla (FTP programme for working with www2 web server)
With the FileZilla client, the user can connect to an FTP/SFTP server and then upload and download files. In addition, text files can be opened in the local text editor. FileZilla then monitors the open file and offers to upload the file if it changes.
Source: https: //de.wikipedia.org/wiki/FileZilla

![[Translate to English:] facebook icon](/fileadmin/SocialMediaIcons/iconfinder_06-facebook_white.svg)
![[Translate to English:] instagram icon](/fileadmin/SocialMediaIcons/iconfinder_38-instagram_white.svg)
![[Translate to English:] YouTube icon](/fileadmin/SocialMediaIcons/iconfinder_18-youtube_white.svg)
![[Translate to English:] xing icon](/fileadmin/SocialMediaIcons/iconfinder_xing_white.svg)